
How to plan FotoFlows that cover what matters, take reference photos your team can match, and get more from every photo report.
A FotoFlow is a virtual supervision flow for a site. Plan it around zones, not square feet.
Each FotoFlow is made of slots, one for each area of the site, and each slot holds several reference photos of that area. Every shift, the app randomly picks one photo from each slot for your team to replicate.
Because your team cannot predict which view they will be asked to capture, every shift produces a daily-changing, representative report of the whole site.
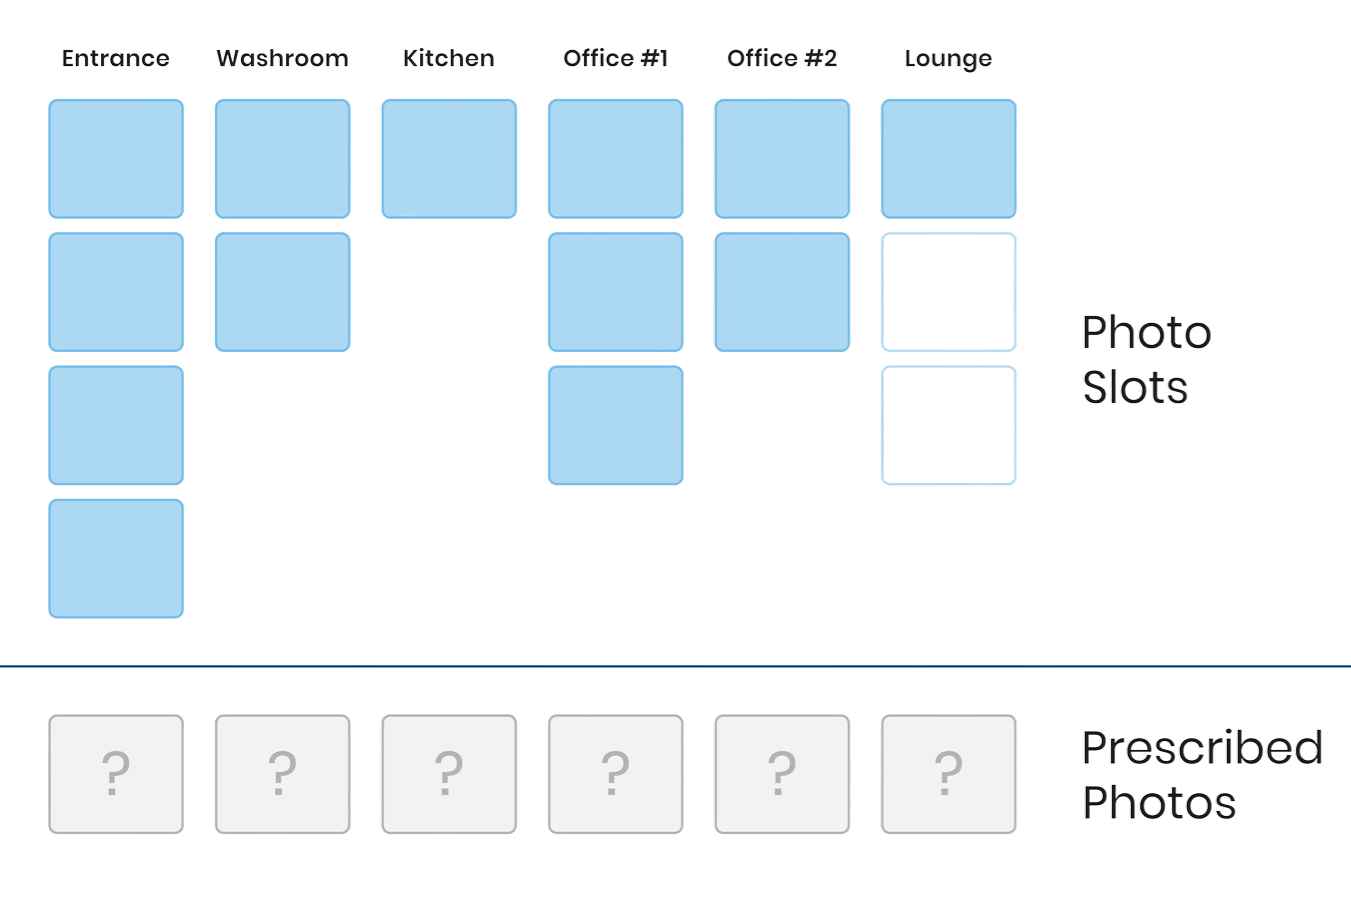
List every area your team is responsible for: restrooms, entrance, lobby, kitchen, storeroom. Each one gets at least one slot. That list is your starting point.
Client-facing areas such as entrances, lobbies, and reception, and hygiene-sensitive spaces such as restrooms, kitchens, and break rooms, justify a second slot. Ask yourself: if this area had an issue, would the client notice right away?
Zones with past complaints, high traffic, compliance requirements, or specific client expectations deserve more coverage. Documenting them protects both you and your client.
For warehouses, hallways, and other large or uniform spaces, use one slot with several reference photos of different angles and corners. The app rotates through them over time, building a detailed record without adding work for your team.
Add zones as client needs change, and retire slots for areas that no longer need regular checks.
FotoFlows work for any visual check: health and safety postings, signage, vendor compliance, instrument readings, or franchise standards.
Reference photos show your team what "done right" looks like. Your team frames every photo to match one, so the quality of your references shapes every report.
You are photographing the target condition. Never take reference photos in a dirty or partially cleaned space.
Turn on all artificial lights and close the blinds, or pick a time of day with stable natural light you can repeat in every season.
Know which slots need reference photos before you walk the site, so you cover everything in one visit.
Remove cleaning equipment, carts, supplies, and personal items. Only permanent fixtures should appear.
Shoot after a full clean. You are setting the visual target.
All lights on, blinds closed, and no phone flash.
Frame a door, fixture, or corner your team can use to find the exact spot.
Step back so the full area is visible. Never zoom in.
Use the same height and distance for every slot in the FotoFlow.
Hold the camera at eye level, parallel to the wall, from a spot where a team member can stand.
New fixtures, furniture, or layout? Retake right away.
It is usually a bad angle or a missing landmark. Review and retake it before penalizing their submissions.
Summer and winter light can make the same room impossible to match.
Ready to upload? Add your best shot to each slot, then save and activate the FotoFlow. See step 4 of the Setup Guide.
Brief your on-site team on what a good photo looks like for each zone. These six rules apply to every photo, every shift.
Turn on every light before taking the photo. Avoid the phone's flash: it causes glare on mirrors, tiles, and floors.
Hold the phone at chest or eye level, parallel to the wall. Don't shoot from the floor or from directly above.
Step back far enough to fit the entire zone in the frame. Don't zoom in.
Use both hands and pause for a moment before tapping the shutter. Blurry photos cannot be verified.
Look at the reference photo in the app first, then stand in the same spot and use the same angle.
No feet, hands, mops, or carts in the shot, and no reflection in mirrors or glass.
_12 Prescribed and Live Camera - no bg.png)
Photo reports are most valuable when you act on them. Build these habits from day one.
Results are most actionable when reviewed the same day. Make a morning review a habit so issues can be addressed within 24 hours.
Issue a corrective action ticket directly from any flagged photo, and use the trend charts to spot patterns across shifts or sites.
Your timestamped photo record is strong evidence of service delivery and accountability for client reporting.
Giving clients visibility into inspection results builds trust and sets your service apart.
Pick up where this guide leaves off.
Step-by-step instructions to create your account, add your sites, invite your team, and build your first FotoFlow.
Read the Setup GuideA module-by-module walkthrough of sites, FotoFlows, users, and results, with the full setup video.
Admin TrainingStart your free 10-day trial or book a live demo with our team.